
Making a short film with AI is no longer limited to generating a few visually interesting clips and stitching them together. A more useful approach is to treat AI filmmaking much like a conventional production: develop the idea, establish the visual language, plan the shots, lock important references, generate scenes, review continuity, and then edit the final sequence.
That distinction matters. AI can handle a growing share of the technical work, but the filmmaker still has to decide what the story should communicate, how scenes should feel, and which creative choices belong in the final cut.
Platforms such as invideo agent are designed around this broader production workflow, combining project context, reference-based generation, specialized creative agents, and editing rather than treating every shot as an isolated prompt.
AI Short Filmmaking Workflow at a Glance
| Stage | What You Create |
| Development | Concept, screenplay, directorial bible |
| Pre-production | Character sheets, locations, look development, shot list |
| Previsualization | Storyboards, mood boards, animatics |
| Production | Generated shots and alternate takes |
| Review | Continuity checks and selected takes |
| Post-production | Edit, sound, color, titles, final export |
The process does not have to be perfectly linear. You may return to the storyboard after testing a scene or revise a character after seeing them in motion. The goal is to keep those changes connected to the same creative foundation.
Step 1: Develop the Idea and Directorial Bible
Before generating video, decide what kind of film you are making.
Start with a logline and a simple story structure: who the central character is, what they want, what prevents them from getting it, and how the situation changes by the end.
Then create a directorial bible. This is the document that defines the film’s creative grammar. It can cover:
- Visual references and color palette
- Lighting principles
- Camera and lens language
- Editing rhythm
- Production design
- Character performance
- Sound and music
- Rules for what should not appear
One filmmaking workflow documented in the attached materials began with a 20-page directorial bible before a single final shot was generated. The filmmaker then tested that document with a simple scene to see whether the agent had actually understood the intended directing language.
You do not necessarily need 20 pages. A concise document with clear, repeatable rules can be enough for a short project.
Step 2: Turn the Screenplay Into a Production Plan
Once the creative direction is clear, move from “what should this film feel like?” to “what exactly needs to be made?”
Break the screenplay into scenes and shots. For each scene, establish:
- Characters
- Location
- Time of day
- Action
- Dialogue
- Props
- Wardrobe
- Shot size
- Camera position or movement
- Approximate duration
This becomes your production bible: an operational reference containing the shot list, character information, locations, look development, and other decisions needed to produce the film.
Invideo agent can organize this information through persistent project Context and scene-level Briefs. In the attached product material, Context contains the rules that apply to the overall film, while individual Briefs contain the requirements for specific scenes.
That separation is useful because a lighting rule may apply to the entire movie while a particular prop or action may matter only in one scene.
Step 3: Lock Characters, Locations, and Visual References
Consistency becomes increasingly important as the number of shots grows.
Create character reference sheets showing the details that should remain stable: face, hair, body type, wardrobe, accessories, and relevant expressions. Do the same for recurring locations, props, and important environmental details.
The attached filmmaking materials describe locking character sheets and environmental references before moving deeper into shot generation.
Treat these references as continuity documents rather than inspiration boards. If a character’s coat must remain red throughout a sequence, write that requirement down instead of assuming the generation model will remember it.
With invideo agent, these assets can remain part of the project’s persistent context rather than being treated as unrelated inputs for every new scene.
Step 4: Build Storyboards and Previsualize the Film
Generating final-quality video immediately can make experimentation unnecessarily expensive and slow.
Storyboard the movie first. The boards can be rough sketches, generated images, or more polished cinematic frames. What matters is that they communicate composition, blocking, screen direction, and shot progression.
You can then turn the storyboard into an animatic or narratic by arranging the images in sequence and adding temporary dialogue, voice-over, music, or sound.
This provides an early answer to important questions: Does the sequence make sense? Is the pacing too slow? Is a reaction shot missing? Does the scene need another establishing angle?
The attached invideo filmmaking transcripts show a workflow where storyboard frames were converted into more realistic mood-board images and then assembled into an animatic for previsualization before final generation.
Step 5: Generate Shots in Manageable Groups
Once the storyboard works, begin generating the actual shots.
Avoid thinking of the whole film as one enormous prompt. Work scene by scene or shot by shot, carrying forward the established character, location, lighting, and directing rules.
For difficult physical actions, it can help to establish a strong keyframe first and then animate from that image. The attached workflows use this method when an action would otherwise be difficult to communicate precisely through text alone.
Also expect iteration. A shot may be attractive but still wrong for the film because the performance, framing, continuity, or movement does not match the surrounding sequence.
One practical advantage of invideo agent is that direction can be expressed more like a note to a creative collaborator—referring back to the project’s established context—instead of rebuilding every creative rule inside every individual prompt.
Step 6: Review Continuity Before Locking the Edit
Do not judge generated clips only as individual shots. Review them in sequence.
Look for changes in:
- Character appearance
- Wardrobe and props
- Eyelines
- Screen direction
- Location details
- Lighting
- Color grade
- Performance
- Movement
- Shot-to-shot pacing
The latest invideo agent workflow can also analyze uploaded footage or rough cuts against existing project context. The supplied product materials describe it mapping footage to the shot list and identifying discrepancies such as a changed prop or an inconsistent grade.
AI-assisted review can help surface issues, but the final continuity decision still belongs to the filmmaker.
Step 7: Assemble and Finish the Short Film
After approving the strongest takes, move into editing.
Slate, the timeline workspace inside invideo agent, is designed to work from the script, shot breakdown, approved takes, and existing project context. It can assemble selected clips in script order to create an initial lineup.
From there, review the film as a complete sequence rather than a collection of generations.
You can adjust timing, replace takes, work with audio, apply color changes, add transitions and text, and incorporate external footage or music. Slate supports manual timeline controls as well as conversational instructions such as requesting alternate shorter cuts or applying changes to marked sections.
Finish by checking dialogue levels, music, sound effects, color consistency, credits, aspect ratio, and delivery specifications.
What’s New in the Latest invideo agent Release?
The latest product materials expand invideo agent beyond individual generation into a more persistent production environment.
Context and Briefs preserve project-wide information while separating the requirements of individual scenes. Expert agents can be assigned roles such as cinematography, storyboarding, casting, or VFX, with project information passed between them.
Multi-Input Intelligence allows the project to work from scripts, images, PDFs, reference footage, rough cuts, and other source material rather than relying exclusively on text descriptions.
Playbooks store repeatable working rules—for example, approval stages or shot-building conventions—while Notebooks provide a more hands-on space for filmmakers who want to work directly with individual generations, models, Pages, Threads, and frame-level edits.
The broader idea is to keep directing, generation, manual experimentation, and finishing connected to the same project rather than repeatedly rebuilding context.
Common Mistakes When Making an AI Short Film
Generating before defining the visual language. Interesting individual shots do not automatically create a visually coherent film. Establish the rules first.
Skipping character and location references. Reusable reference material gives every later generation a clearer target.
Trying to solve an entire sequence in one generation. Breaking complex scenes into smaller groups or individual shots generally gives the filmmaker more opportunities to control the result. The attached workflows explicitly describe a tradeoff between larger multi-shot generations and greater per-shot control.
Locking shots before watching them together. A good shot can still interrupt pacing or continuity when placed beside the shots around it.
Treating AI output as the final edit. Sound, pacing, color, transitions, and shot selection remain important parts of filmmaking.
Conclusion
Making a short film with AI is most effective when you treat it like a real production: plan the story, lock the visual language, generate shots in stages, review continuity, and refine the final edit.
Invideo agent supports this workflow by keeping creative context, references, generated assets, and editing decisions connected throughout the project. The goal is not one perfect prompt, but a consistent directing process that helps turn an idea into a finished short film.
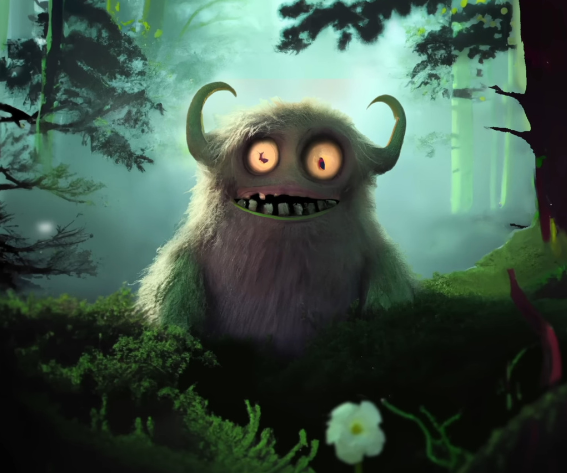
Image source: The Critterz / OpenAI
You may also like:





Leave a reply