
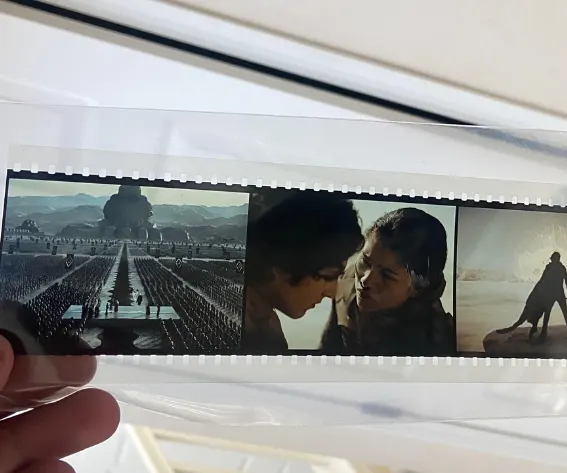
Image source: Reddit (u/Marlon0201)
Every filmmaker has footage that stays with them long after a project is finished. It might be a close-up that captured an unexpected expression, a beautifully lit scene from an early short film, or a behind-the-scenes moment that says as much about the production as the finished movie. These images often end up buried among exports, project folders, and old hard drives, even though a single frame could still be useful years later.The problem is that older footage does not always hold up when you return to it. Limited camera resolution, compressed exports, and imperfect focus can leave an otherwise compelling film still looking softer than you remember. That does not necessarily mean the shot has lost its value. A frame that can no longer carry a scene at full quality may still deserve a place in a storyboard, director portfolio, presentation, or promotional design. Giving those frames another chance does not need to turn into a complicated post-production project. A few carefully chosen improvements can make selected stills clearer and easier to reuse, provided the results stay faithful to the mood and visual character of the original work. The trick is knowing whether a frame needs help with sharpness, resolution, or both.
Fix Blurry Film Stills Before You Discard Them
Some of the most interesting frames in filmmaking come from less-than-perfect shooting conditions. A handheld camera catches an actor moving across the room, a close-up is filmed in difficult light, or a spontaneous moment happens before anyone has time to adjust focus. During playback, the scene may work beautifully; freeze that moment for a pitch deck or film poster, though, and the softness suddenly becomes obvious.
Before giving up on the image, it is worth finding out where that softness came from. Motion blur and missed focus are different from the detail lost through compression, and AI enhancement cannot reliably recover everything a camera failed to capture. Even so, mild softness can sometimes be improved enough to make an extracted frame useful as a standalone image.
Start by looking for the best available source. A still exported directly from the original recording will usually be more useful than a screenshot taken from a streaming platform, a messaging app, or a social media post. Those copies may have been compressed several times, leaving less detail to work with. If a compressed version is the only surviving copy, however, it may still be worth testing rather than abandoning the shot outright.
For a frame that has lost some clarity, a quick way to fix blurry photos can be useful when the original shot still has potential for a portfolio, storyboard, or campaign. Wink Image Enhancer makes this kind of adjustment accessible without requiring a lengthy manual editing session.
Wink Image Enhancer is designed to improve perceived clarity by working on edges, textures, and facial details. For filmmakers, that makes it relevant to character close-ups, production portraits, and frames chosen for promotional materials. The aim is not to turn a softly lit scene into an unnaturally sharp publicity photograph, but to make the still clearer while retaining the original cinematography.
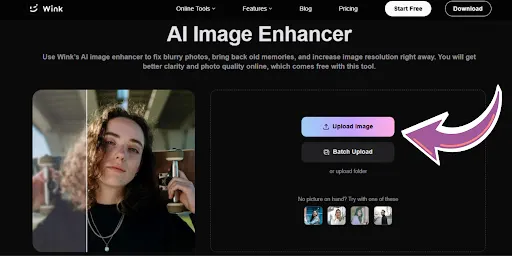
To try it, open Wink Image Enhancer and upload the selected still. If the image comes from a video, export the frame first using your usual editing software, preferably from the highest-quality source you have. That way, the enhancer starts with the strongest possible image rather than a compressed screenshot.
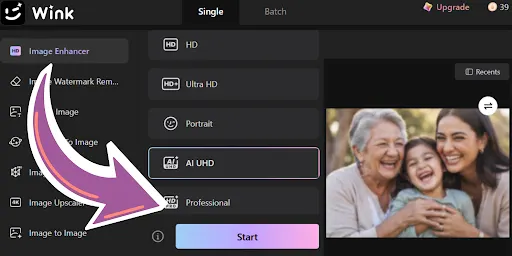
After uploading the image, you can choose from several enhancement levels depending on the condition of the frame. HD offers a lighter adjustment for mild softness, while Ultra HD aims for more definition when fine details disappear at larger sizes. Portrait is particularly relevant to close-ups featuring faces, and AI UHD is a stronger option to test on older or especially soft stills. Professional is another option for images that need more clarity or size for presentation material. These settings are worth comparing rather than assuming the strongest one will automatically give the most convincing result. Select the option that suits the frame, then press Start to process it.
Once the processing is complete, examine the result at full size on a laptop or monitor, not only on your phone. Look closely at eyes, hair, costumes, and the edges of objects, where artificial-looking detail can become noticeable. Keep the enhanced version alongside the original so you can compare them before deciding whether it belongs in the project.

A light touch is often more convincing than an aggressive fix, especially if the original footage has a softer or grainier visual style. Filmmakers spend a great deal of time shaping the appearance of a scene, so improving clarity should not come at the expense of the lighting, texture, or atmosphere that made the frame worth saving.
When Low Resolution Is the Real Problem
Not every soft-looking film still suffers from blur. Sometimes the image simply contains too few pixels for the job you want it to do. A frame from an early digital short, an old video export, or a compressed online copy might look fine as a thumbnail but struggle as soon as it needs to fill a screen or appear in a larger design.
That limitation becomes especially clear when preparing director portfolios, pitch decks, festival materials, and promotional graphics. Enlarging a small frame without any additional processing can make faces, set details, and fine textures look blocky, even if the composition itself is strong. In these situations, the goal is not to change the shot but to make the existing image usable at a larger size.
This is where an image upscaler can help. Rather than simply stretching the pixels, Wink AI analyzes the image and generates an enlarged version with additional estimated detail. It cannot recreate the exact information missing from the original recording, but it can sometimes produce a cleaner still for filmmaking materials where a higher-resolution image is needed.
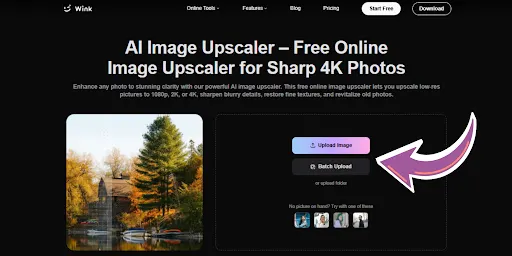
To upscale a film frame, open Wink Image Upscaler and upload the still you want to enlarge. As with enhancement, the best starting point is an image exported directly from the original footage. If the master recording is no longer available, use the clearest surviving copy, avoiding repeated downloads and screenshots wherever possible.
Once the frame is uploaded, choose the available upscale setting according to where the image will be used. A 2x increase may be enough for a portfolio page or presentation, while 4x is worth testing for a larger poster layout or promotional graphic. Those numbers describe how much the image dimensions are increased, not a guarantee that it will look sharp at a particular print size. Select the resolution, press Start, and review the output before committing it to a design.
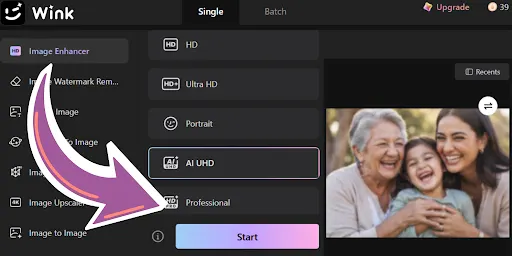
The result is a larger version of the selected frame that may make it easier to work with in a visual presentation. Details in clothing, faces, and backgrounds can appear better defined than in a simple stretched copy, though the improvement depends heavily on the quality of the original image and the content of the shot.

Before using the upscaled still, inspect it at full size and compare it with the source. Pay particular attention to facial features, text, hair, and high-contrast edges, which may reveal invented or exaggerated detail. Save both files together and remember that enhancing an extracted frame is not the same as restoring the video footage itself; these tools are most useful when the final deliverable is an individual image.
The Film Frames Worth Keeping
One of the easiest ways to lose valuable creative work is to leave everything buried in old project folders. Footage gets moved between hard drives, editing timelines become outdated, and individual shots that could have been useful for future projects are forgotten. Sometimes a filmmaker does not recognize how valuable a particular composition or performance was until years later, when the original files have become difficult to track down.
A simple archive habit can prevent that. Once a month, revisit an older project and choose a few frames that still stand out, whether for the lighting, a performance, an unexpected moment, or the atmosphere of the scene. Export them from the best available source and save them in one dedicated folder with a reference to the original footage. While reviewing the collection, note which frames are merely soft and which are too small for the purpose you have in mind; enhancement may help the first problem, while upscaling is worth testing for the second.
There is no need to process every image or force every shot into a sharper, cleaner look. Concentrate on the frames that deserve to be seen again, and keep the untouched versions alongside anything you enhance. Over time, that small collection becomes a visual record of your development as a filmmaker, ready to draw on for portfolios, pitch decks, festival submissions, or new creative ideas. Not every memorable moment makes it into a final cut, but sometimes one carefully preserved frame can bring back the feeling of an entire scene.


Comments
No comments yet. Be the first to share what you thought.